Appearance
Install the Atlas Experience Agent
The Experience Agent installation has been scripted to simplify installation with particular consideration given to installing the Agent on-premesis with the limited access to the PC.
This document steps through installing Agents via the Experience Manager.
WARNING
The installation process is a work in progress and subject to change. Steps in this document may be inconsistent with actual use at times and between version.
Instructions
The Experience Agent may be installed via the Atlas Web Console. Begin by logging into the Experience Manager and selecting Nodes (path: /clusters/nodes/provision/).
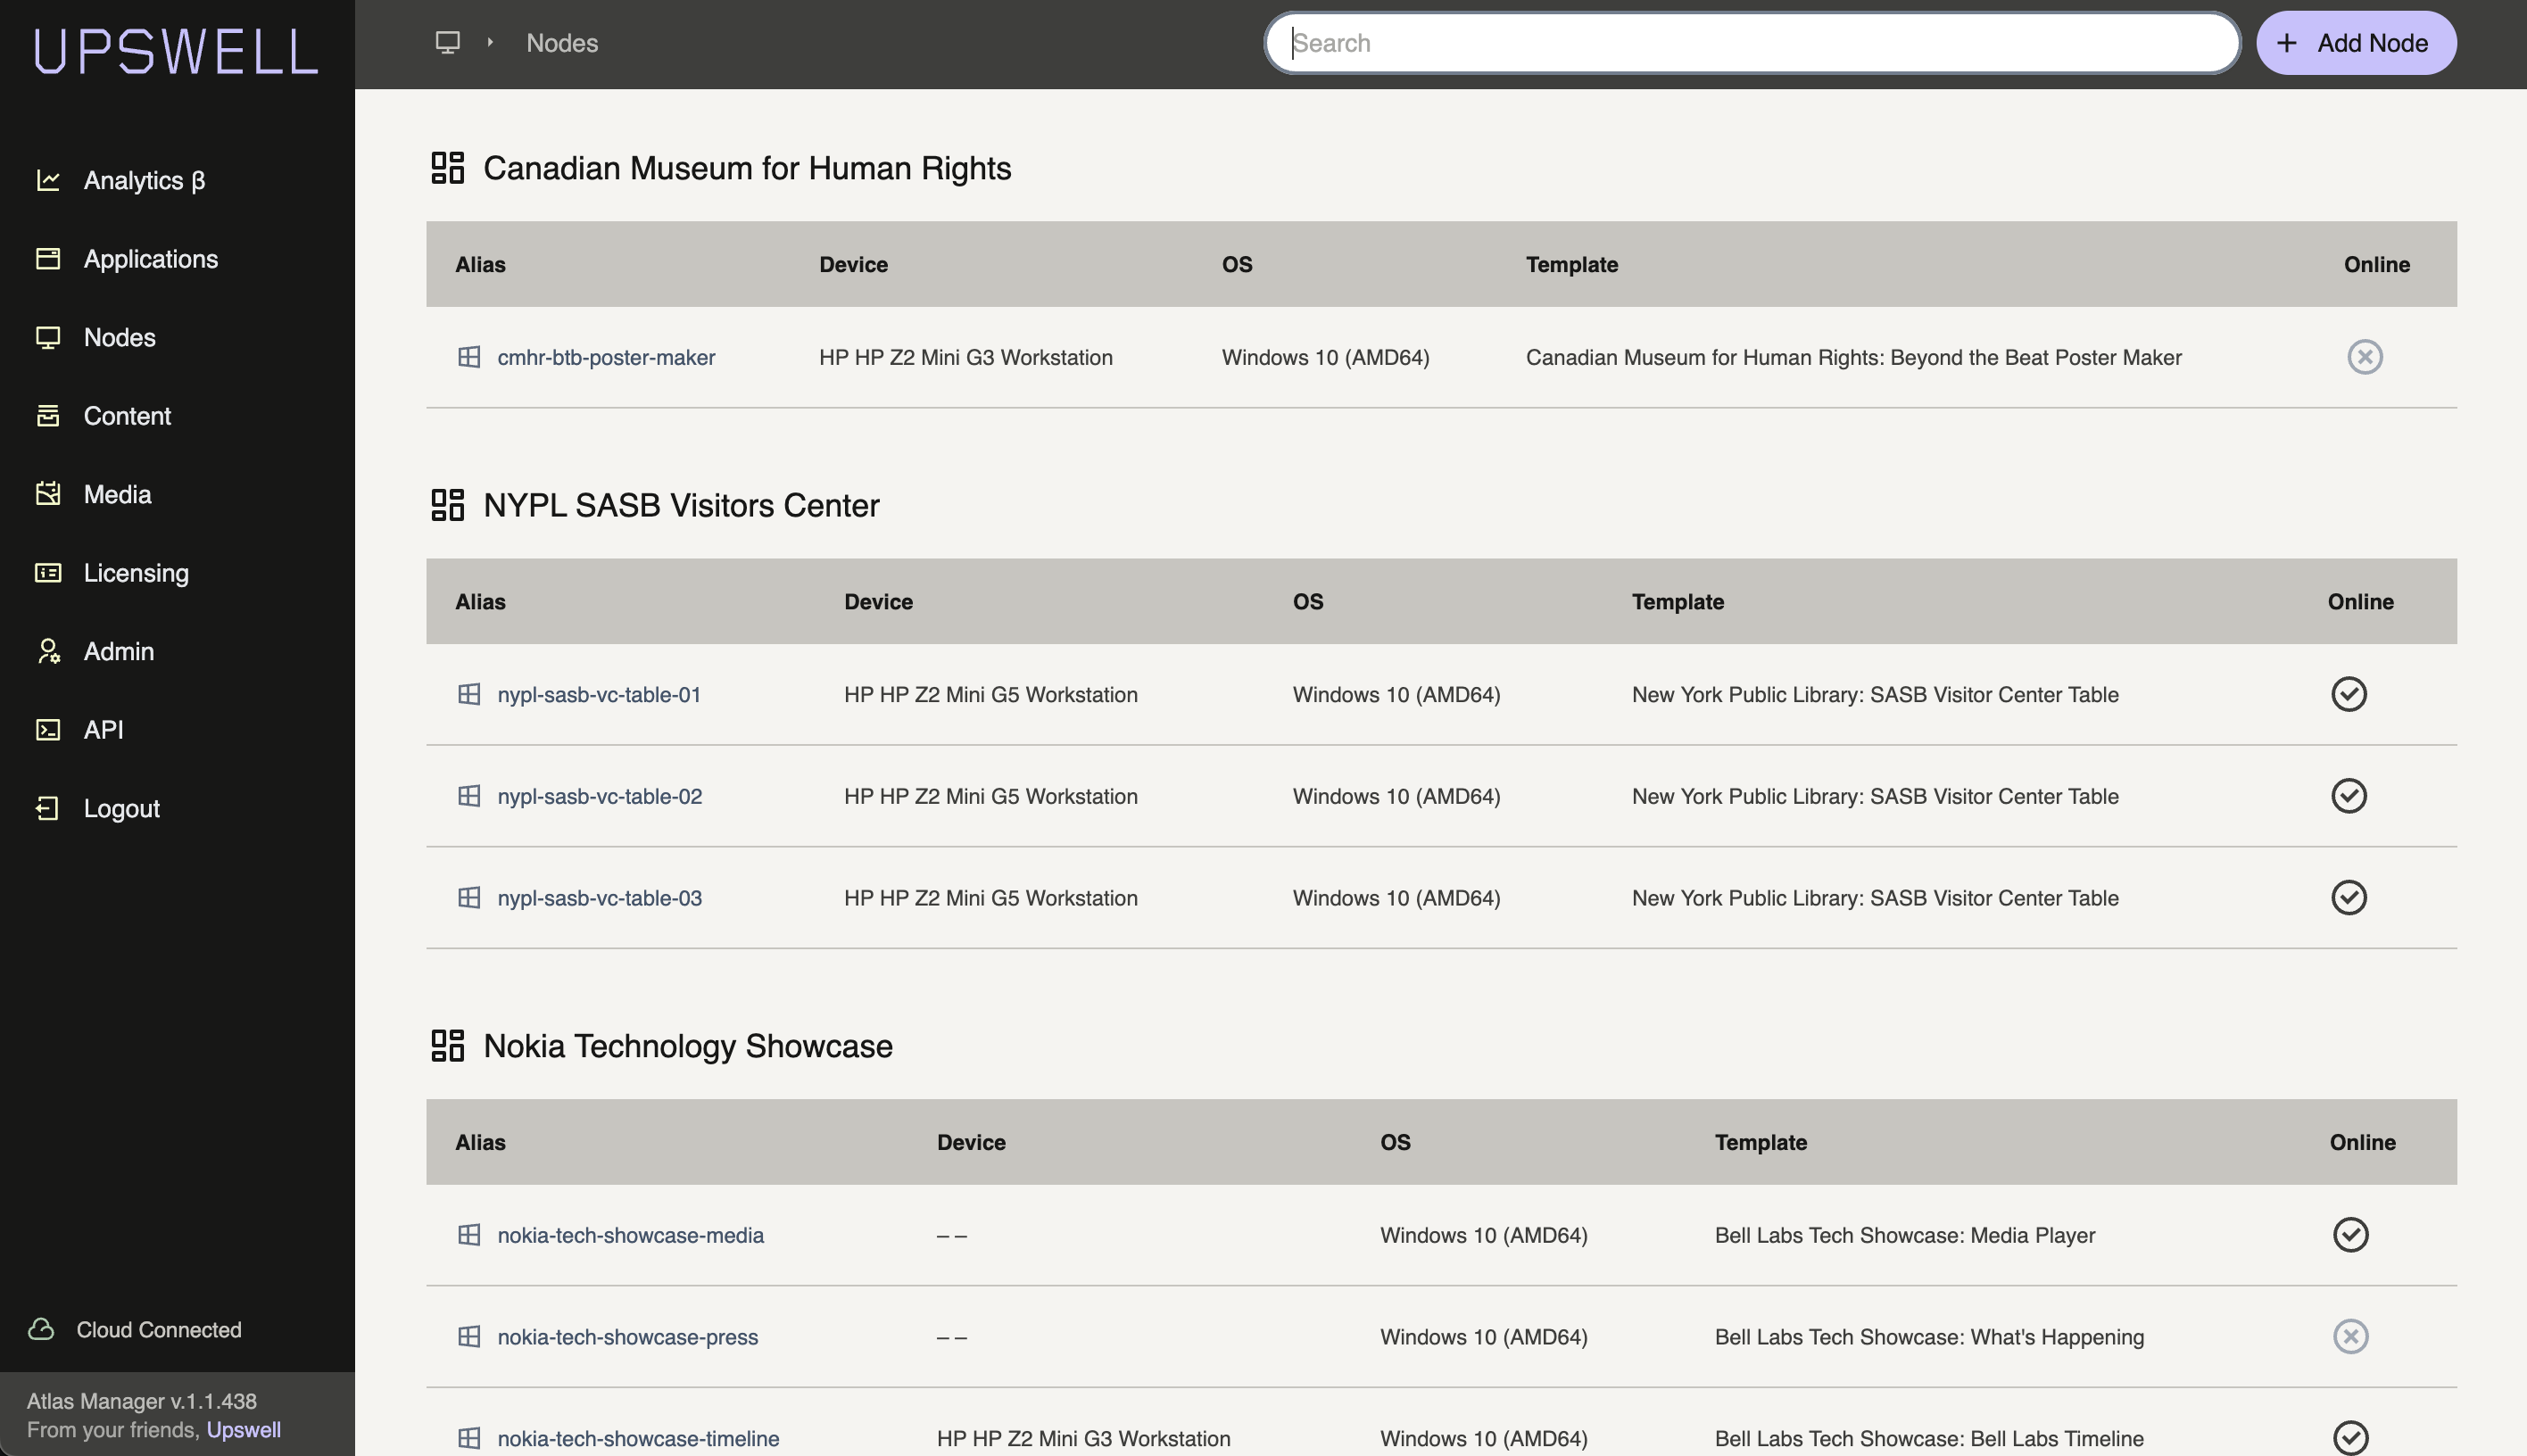
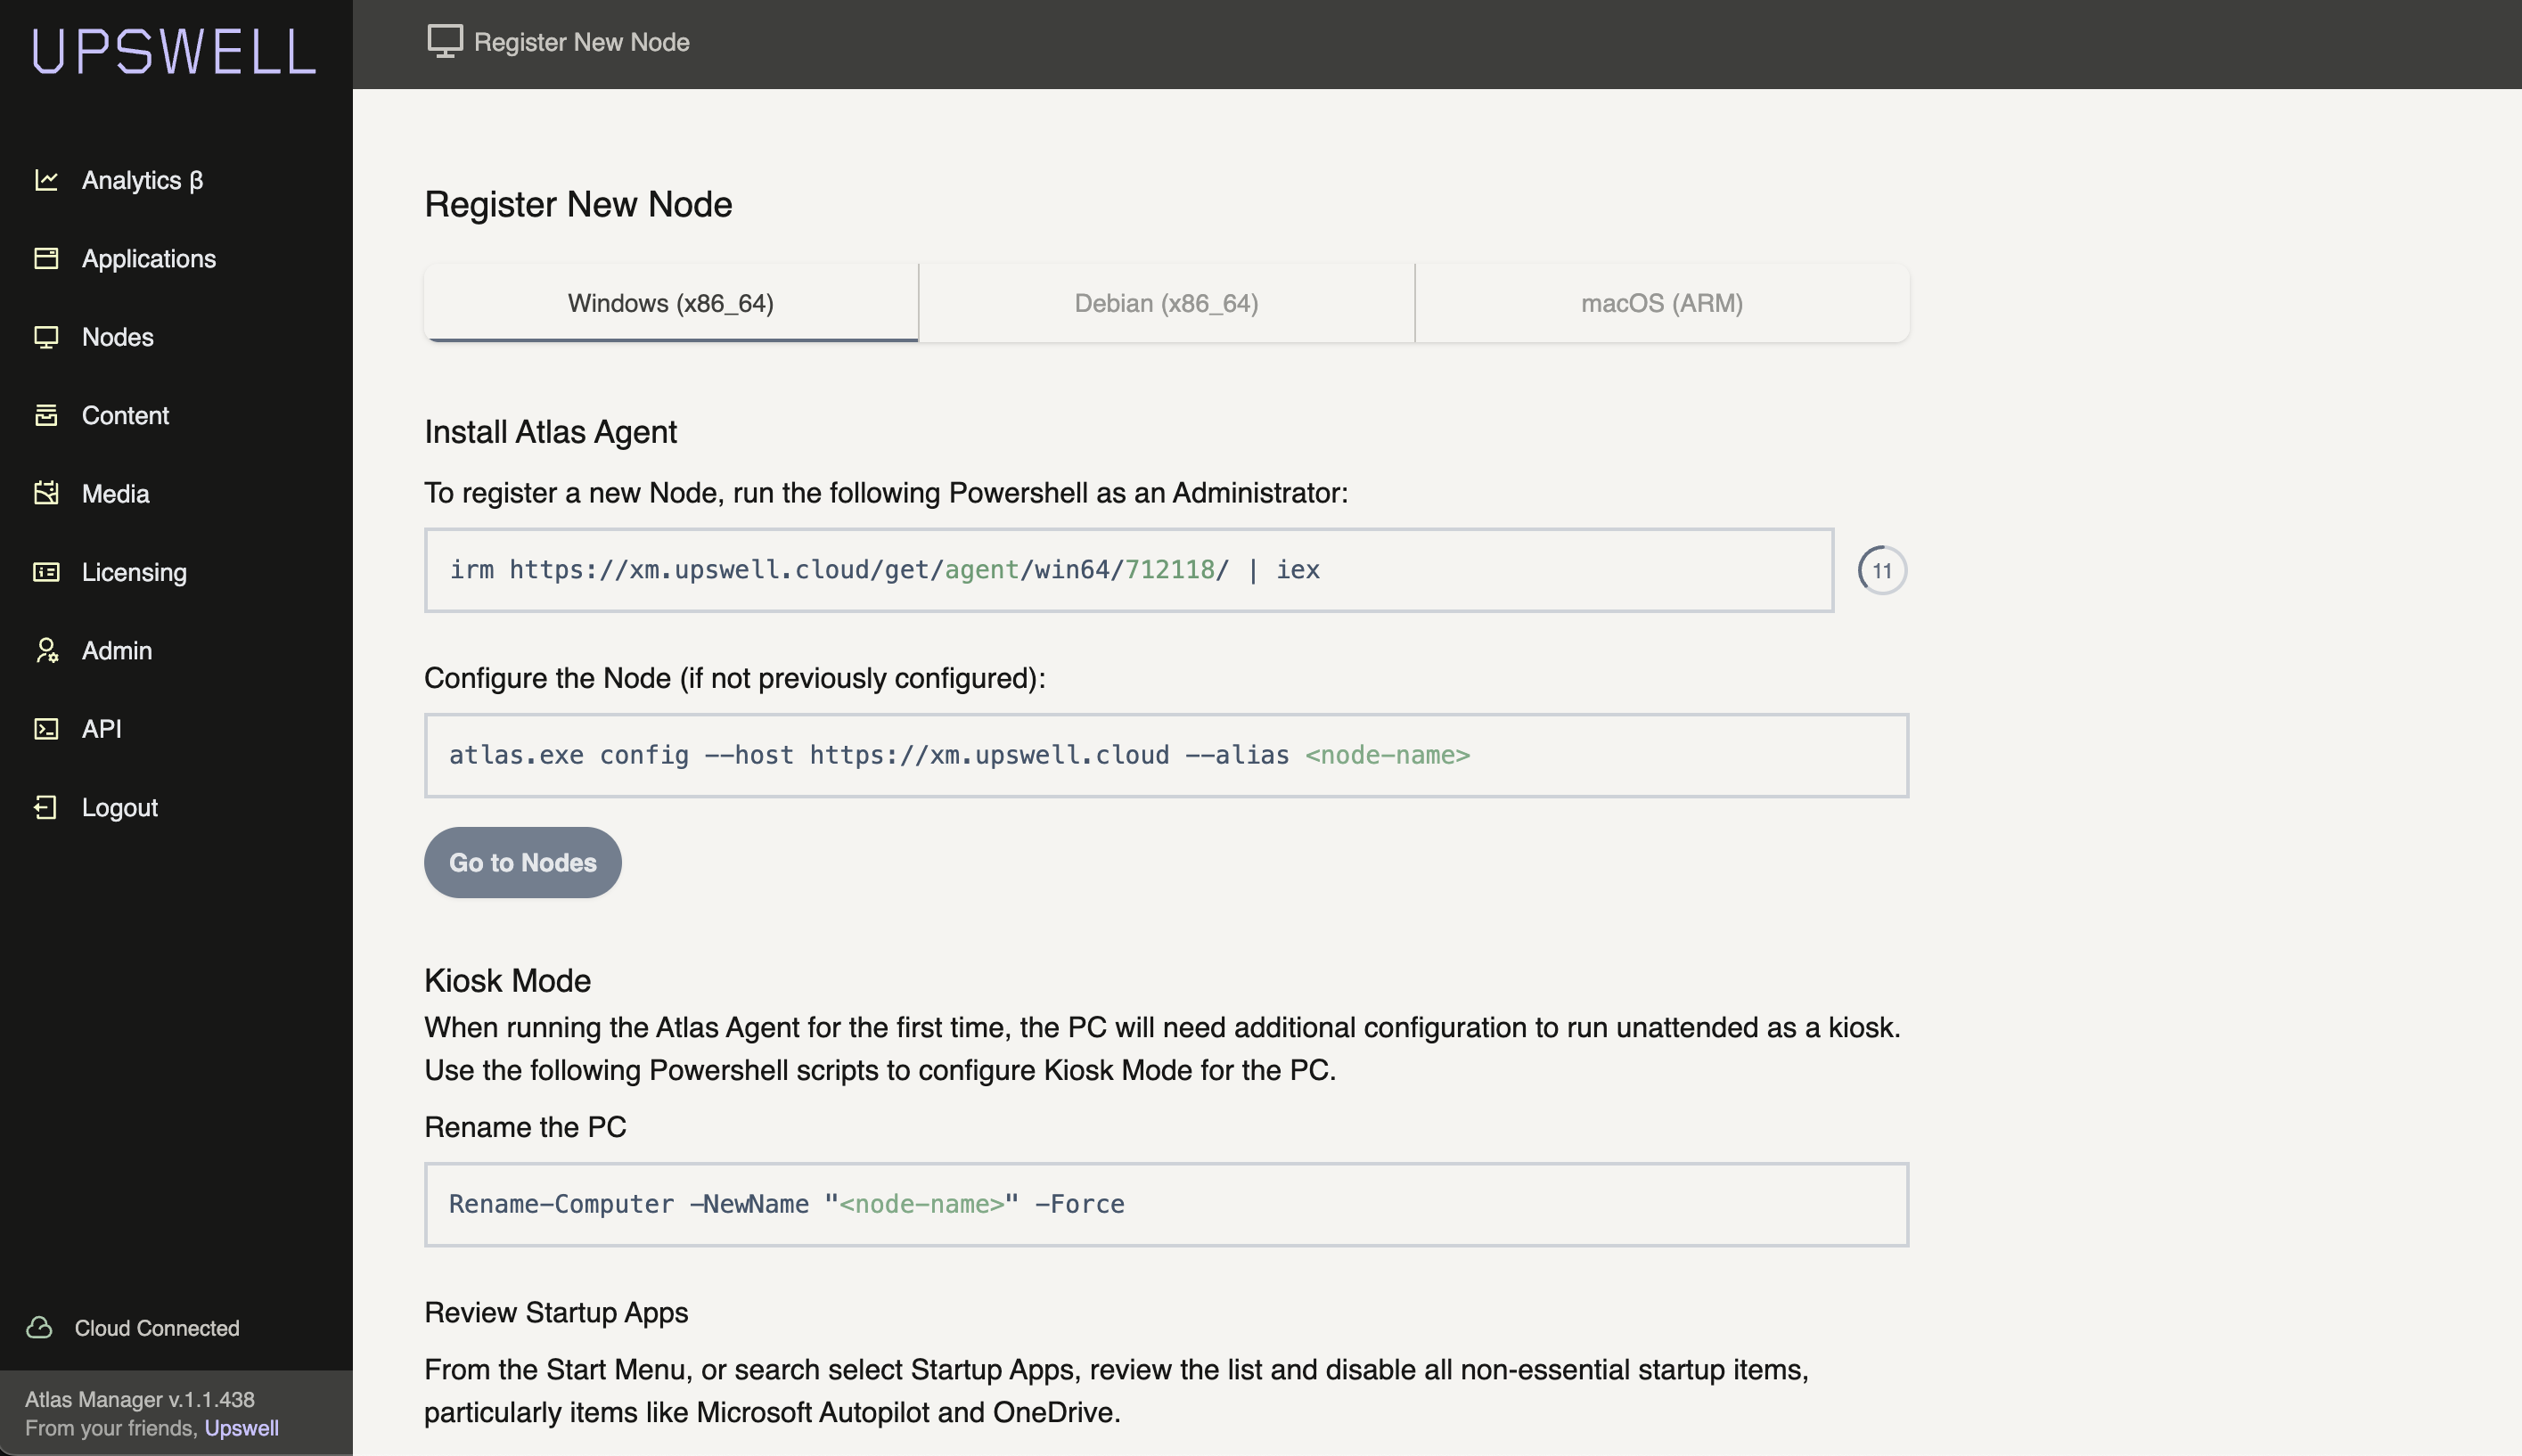
Select + Add Node for the Guided Installation page:
Agent Installation
The Atlas Agent is installed via Powershell or Bash scripts that both download, install and schedule the Agent requiring only one command for the Agent to run.
Windows x64 (Powershell)
To install the Experience Agent on the Windows 10+, open Powershell as an Administrator.
WARNING
Powershell requires Administrator privileges to install the Agent, if run with standard User privileges, installation will fail.
Run the following, obtaining the TOTP token from the Guided Installation page above.
This utilizes irm to download the file and iex to immediately run the downloaded script.
powershell
irm https://xm.upswell.cloud/get/agent/win64/[totp token]/ | iexLinux arm64/x64 (Bash)
WARNING
At this time, only arm64 and x64 based Debian based Linux variants are supported, including: Debian, Rapberry Pi OS and Ubuntu.
INFO
When running a Linux Node, it is recommended to install the Atlas Experience OS, a Headless and Kiosk configuration package for Debian.
If you want to install the Experience Agent without the Atlas Experience OS:
sh
sudo bash <(curl -fsSL https://xm.upswell.cloud/get/agent/<arch>/<token>/)macOS ARM (Bash)
WARNING
The Experience Agent has been tested throughly and runs on macOS ARM devices, but is not currently built during the release process. If you have macOS installation requirements, contact Upswell to discuss your deployment requirements.
Configure the Environment
The atlas or atlas.exe executables should be placed on the Node’s PATH so that they are accessible from any folder within Bash or Powershell.
Before running the Experience Agent, the environment needs to be configured using the config command. Open Bash or Powershell (depending on the OS you are running) a
For Linux:
Configure agent (if not previously configured):
sh
su kiosk
cd ~/
atlas config --host <host> --alias <node-name>
For Windows:
bash
.\atlas.exe config --host https://<tenant>.atlasss.app --alias gallery-station-01This will set the host environment file, indicating which host the Experience Agent connects to when it starts. It will also confirm that the id_rsa and id_rsa.pub files exist in the ~/.ssh/ folder, and if they don't it will attempt to create a new RSA keypair.
Run the Agent
Once the Agent is configured you are ready to run the Agent and start the automated registration and provisioning process:
For Linux:
sh
su admin
systemctl start atlas
journal -fu atlas
For Windows:
bash
Start-ScheduledTask -TaskName "Start Atlas Agent"TIP
For Windows installations, you will find a Desktop shortcut labeled Run Me that will launch the Agent.
Next Steps
Once an Agent is installed, it will need to be configured via the Experience Manager. See Node Managenent to complete Node setup.